Baking the “Perfect” Apple Bread: Don’t Trust the ‘Gram
The Reality of Amateur Baking in the Social Media Age

Turning back the clock to Autumn…
While this post is out of season, it had to be posted. Needed to be posted. Our experience with the reality of social media is at stake and it’s time to be brave.
“Blasphemy!” one might say. “This is a seasonal blog! And it’s winter! ”
This current time of year is exactly why we need a dose of author honesty online, and that’s what this post is. Many of us are on social media with our New Year’s resolutions, holiday photos, and end of the year round-ups: and everything looks squeaky clean and edited perfectly.
Here’s the thing: all of these (wonderful) things are only a snapshot of a messier whole picture.
I felt this idea is something to be explored. So let’s take a brutally honest-to-goodness deep dive into one of my Instagram-ed Autumn bakes, to see what it really looked like from the inside:
Certain (nice looking) photos of the baking experience were posted to my old Instagram page, for posterity. But did these couple snapshots show the whole picture? Decidedly not. Let’s take a look behind the scenes.

Note: This post contains affiliate links, which means I may make a small commission from any products purchased through clicking on the link. See Disclosure Policy for details.
Below is a link to the recipe I tried out, by Jennifer at Seasons & Suppers (no affiliation, just giving credit for the recipe’s origin and admiring the writer’s style), who in turn adapted it from Sarabeth’s Bakery: https://www.seasonsandsuppers.ca/chunky-apple-yeast-bread/.
Definitely see her page for any actual instructions as I just have my abbreviated version here (hello, copyright laws!). Let me just say that the author of said recipe is fantastic at writing. The instructions are clear. The tips are helpful and descriptive. Something about the recipe’s vibe makes baking feel like you’re in the Great British Baking Show tent, where people are gracious, knowledgeable, and happily churning out desserts at pastel workstations.
Anything that went wrong with this bake is on me. And boy howdy, things took a few turns.
Tackling the Beast
Trying out this recipe for two loaves of apple bread started off strong. I stood in my kitchen and got my bearings.

The Instagram ingredients image that I shared. The other images, well. They have stayed on my phone until now.
Ingredients for this recipe:
3 tsp active dry yeast (one small packet)
3/4 Cup lukewarm water
2/3 Cup lukewarm milk
3 Tbsp sugar
1 Egg yolk
1 tsp vanilla extract
1-1/4 tsp salt
4 Cups all purpose flour
4 Tbsp butter, room temperature
Apple Filling:
1-1/2 lbs apples, peeled and cut into 1/2” pieces
2 Tbsp sugar, or less depending on what variety of apple you use
1 tsp cinnamon
1 Egg yolk
TIP: I pre-measured the ingredients in individual bowls. I’ve found doing this to be helpful, so that I don’t lose track or waste time by measuring as I go along.
The recipe started in familiar territory: yeast and water. TIP: I like to use a food thermometer to make sure the water is warm enough to activate the yeast, but not so hot as to kill it: approximately 105 degrees Ferenheit to 115.
Adding the other ingredients went smoothly. The dough mixed easily, no issues. A fabulous start.

Continuing, not quite neat. Photo was for my own records only.
Upon kneading, the dough felt great, sort of springy. After I kneaded for a minute or two, I put it into a round, uncovered, greased casserole dish. The oven was pre-warmed (and turned off) to put my casserole dish in, so the dough could rise in a cozy place. See that? Thinking ahead.
…Except the oven was still a bit too warm and the bottom of the dough started to bake a bit. Whoopsie.
Seasoning the Innards
While my dough for the two loaves rose (now covered and on the cold stovetop), I moved on to preparing the bread filling: Apples and spice. Mmmm.
Peeling and Coring apples I could handle. Chopping was almost a success, with just an ever-so-slight nick to my index finger.

TIP: I substituted Apple Pie Spice from vendor The Spice House instead of cinnamon. While the star anise in it gives a strong licorice flavor, it also allows the filling to be savory with a depth of taste. I'd be curious to try this spice with a more sugary filling to see how they interact. (As suggested by the original recipe Author, I opted to leave the sugar out of the apple mixture as I was using a sweet apple variety.) (At the time of publishing, I am not affiliated with The Spice House — just an enthusiastic fan!)
You could also try The Spice House’s variety of cinnamon spices if you prefer to stick closer to the original recipe. Check out their varieties here.

Apples with spices
Battle with the American Standard Measuring Units
(or, every day life)
Now with the dough risen (Yesss! Yesss! I did it!), it was time to separate the dough into two balls and roll them out flat, ready to receive the filling.
Roll the two batches of dough each out to 15 inches x 10 inches. Oh boy, here we go. This is where things get dicey. Might as well have been in metric for all I know, as I can’t estimate distance or size in either.
Did you know that in a previous professional life I helped make houses stand up?
That’s right.
Go ahead, feel secure in your wood and nails structure. Don’t think about the interns who nervously helped calculate its architectural integrity. Not at all.
Rolling the lopsided dough into happy looking rectangle/circle/blobs, I patted myself on the back for my efforts.
Swirling Fruits
Next instruction: sprinkle the fruit onto each dough rectangle and Roll them up. I’ve eaten a Little Debbie Swiss Roll or two in my day, folks — I know how a proper swirl looks. I did this part slowly, carefully. Don’t do it so tight that the fruit scoots to the other side of the dough and falls off. Nailed it.

Next, Flour the cutting surface and cut the dough rolls down the center and then cross-ways into rectangles.
Cutting is easy peasy. What’s so hard about all this baking stuff?
In my hubris I neglected the flour.
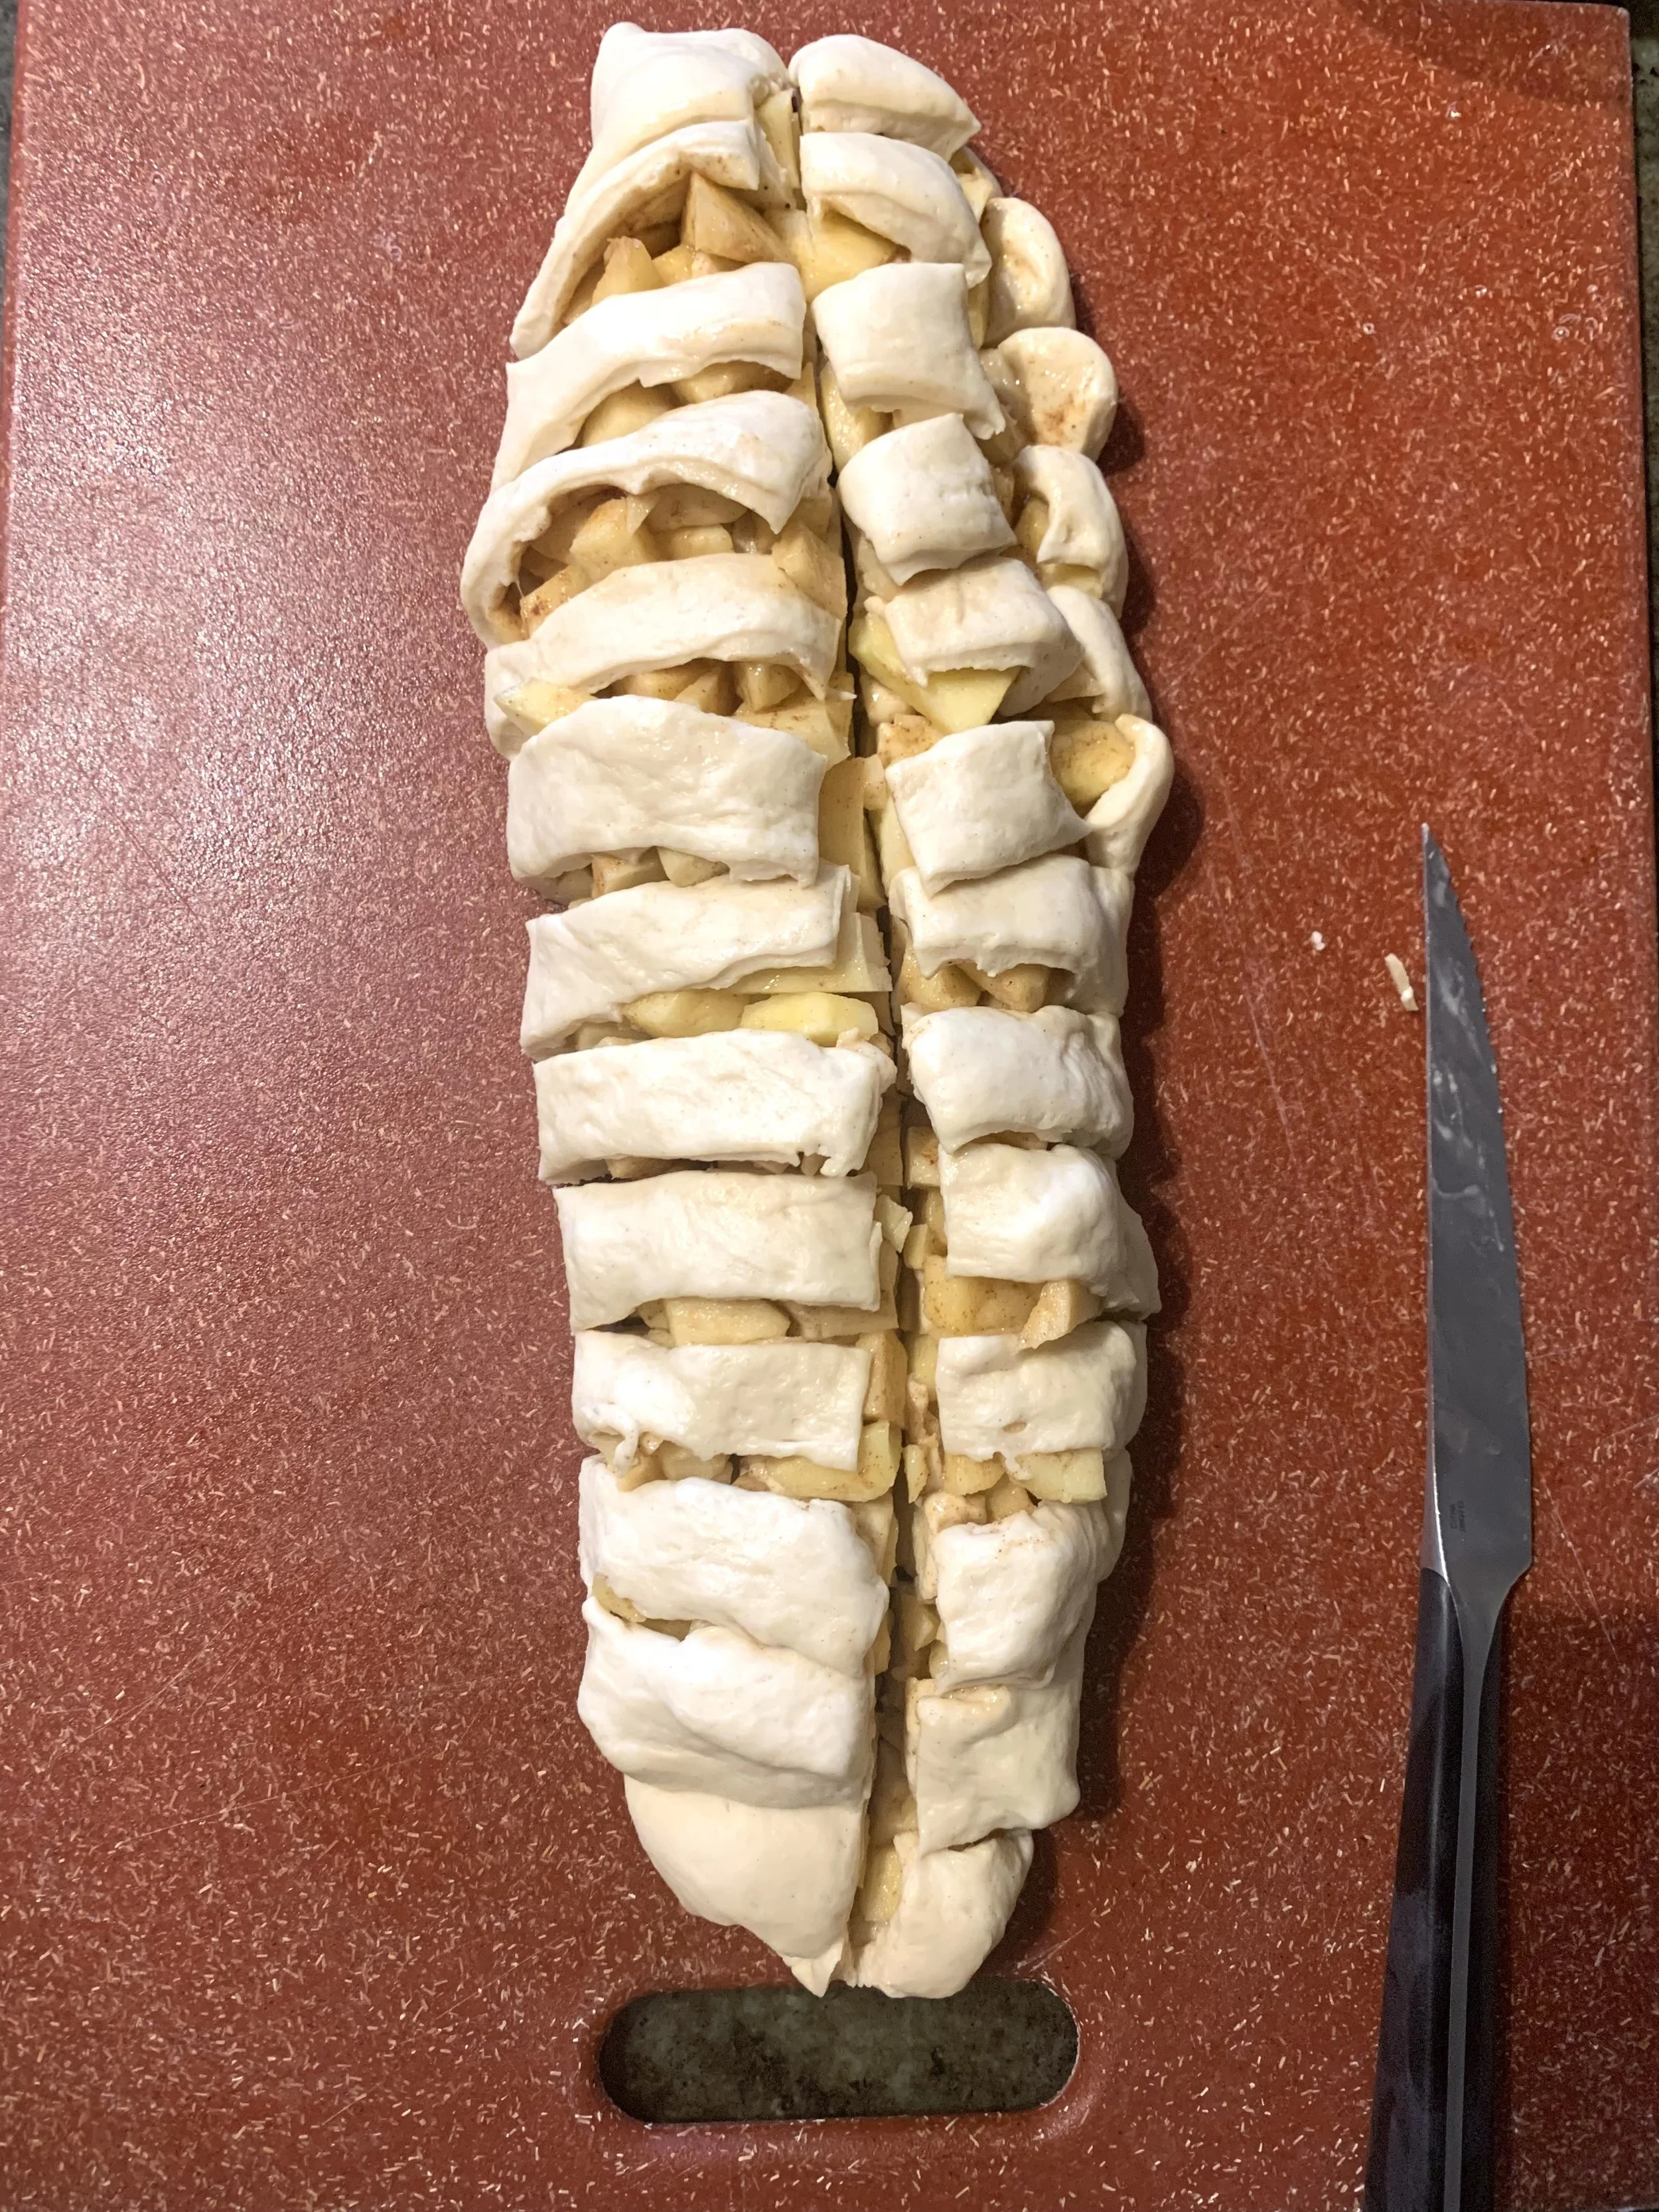
Now, pick up the dough squares and arrange into two tins. Uh oh. I had gotten too cocky. Now this whole part eluded me. What to use? Fingers? Pancake turner? Levitation? No method seemed viable.
Batch #1: I used my fingers. This was quite the error in light of the de-floured situation. Everything fell apart and it became more of an apple scramble than a bread.

Dough Batch #1… eesh.
Batch #2: Much better with the pancake turner (spatula). Perhaps the dough saw the carnage that happened to the first batch and decided it had better be on its best behavior.
Forgotten (Important) Direction: Sit dough into (2) 8”x4” tins. Hmm. I have one 9”x5” and a 9”x9”. Well-behaved dough batch #2 was given the short and squat brownie pan.

Dough batch #2… also not quite as intended.
Hoping for the best, I let the little babies rise for the allotted 45 minutes. And then for a few more, since I forgot to preheat the oven.
Trust Issues in 2021
After popping the loaves into the oven, (at 350 for 45 minutes) I posted a lightly edited photo of my initial ingredients to Instagram, letting my friends know that I was baking, capable, and experimenting with well-respected spice companies.
Posted Ingredients Photo
If all of this post doesn’t tell you to not believe what you see on Instagram, nothing will — The ingredients in the photo appeared:
Beautifully ripe and nicely arranged.
Ready to be expertly handled.
Made to be worked into a magazine-ready finished product.
…These ingredients should not belong to someone who had trouble separating the egg and had to pick up the yolk with her bare hands. And yet, there we were.
And when the bread was turned out and cooled, I didn’t post the full final product. Why? You read all of this post, right? You can guess how the first one looked- unrecognizable as bread. I hadn’t quite nailed the second one’s appearance either. Better to post a photo of just one slice and leave people to their imaginations.

Unshared photo #1… I think we can all see why.
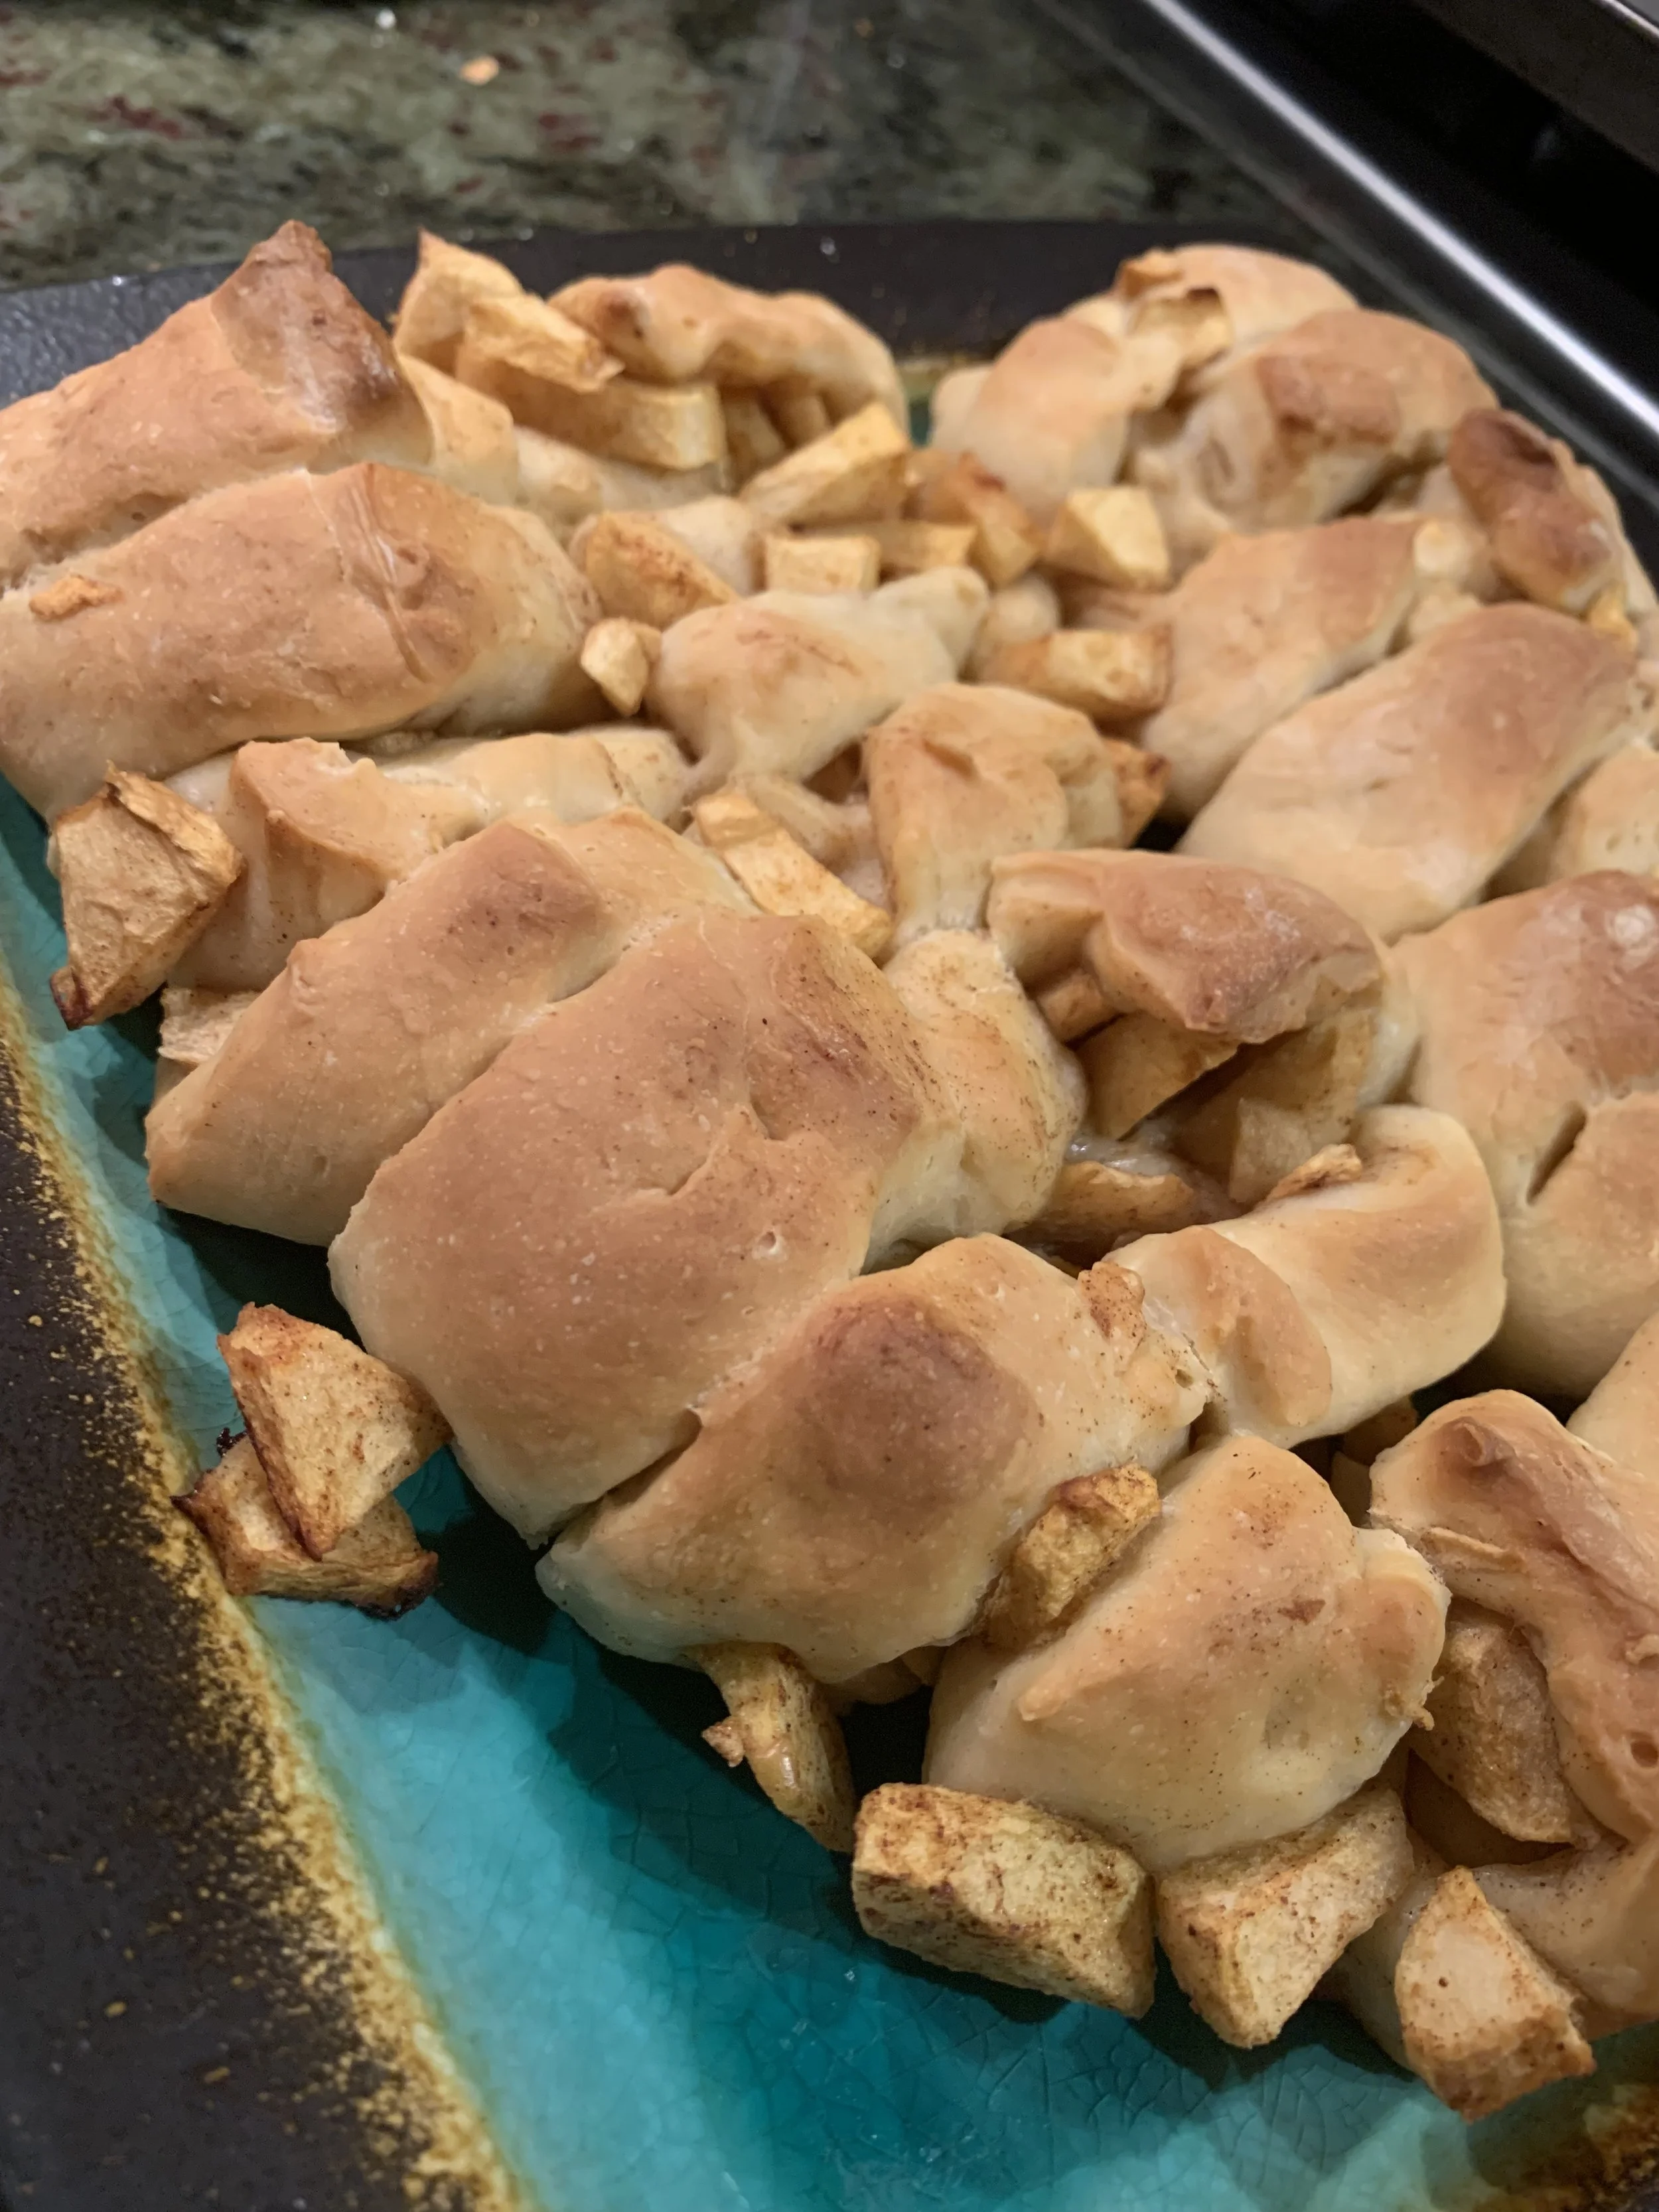
Unshared photo #2… appetizing, no?

The final social media image. The pesky corner shadow was the least of my issues at that point and could be overlooked.
See how easy it is to make it look easy? The photos were technically true, the posted ones just didn’t show the whole process.
Don’t trust the ‘gram. A small slice looked good. Ingredients looked nice. The entire loaves did not.
However: They tasted good, were baked through nicely, and left us satisfied. The basic baking trifecta. Which in the end, is the real important part anyway.
Takeaways
Life looks great on social media — we’ve got filters, photo cropping, and highly edited situations that beautifully capture that one special moment in time.
Seeing these moments on others’ pages, it’s easy to compare ourselves with them and come up short, feeling “less than” — less successful, less productive, less experienced, and the list goes on and on.
What if we look at ourselves and see how many small snapshots of our own life look just as great, even if the whole thing feels like a mess to us? Maybe someone else is looking at our life thinking we’ve got it all together, same as we’re looking at them and wondering where we veered off-course. Seeing only a part of the whole won’t give anyone the complete, full picture.

So cut yourself a break, and give others one too when they break the fourth wall of social media and give real insights into the messy, less-than-photo-perfect moments. We all have them. We’re just not used to seeing the sausage be made anymore — it’s a clip here and a quick post there.
Don’t get me wrong — ring lights and tripods are awesome, and seeing beauty in the world can inspire us all to great things in our lives. Just remember that beauty also lies in the just-rolled-out-of-bed, trying your hardest, doing the best you can moments, even when they feel less than perfect.
FINAL Final Thoughts
I do recommend the Apple Bread recipe. We enjoyed eating the loaves. The recipe’s timing seemed just right, and it baked all the way through. It satisfied fall cravings while not heading into over-sugared territory. I’d make it again.
I fully believe that it can create a beautiful looking tear apart loaf. I’d like to think my first one was simply more substance over style, with a bit of adventure along the way.
So try your hand at it. And then, when you’re feeling brave, try posting the final outcome on social media: unfiltered.
Happy baking.